
Deployment Part 1: Containerization aka Docker
Is all fun and game until you are need of put it in production.
It’s time to deploy the first version of our site and make it public. They say that if you wait until you feel ready to ship, then you’ve waited too long.
Is our site usable? Is it better than nothing? Can we make lists on it? Yes, yes, yes.
No, you can’t log in yet. No, you can’t mark tasks as completed. But do we really need any of that stuff? Not really—and you can never be sure what your users are actually going to do with your site once they get their hands on it. We think our users want to use the site for to-do lists, but maybe they actually want to use it to make "top 10 best fly-fishing spots" lists, for which you don’t need any kind of "mark completed" function. We won’t know until we put it out there.
Over the next couple of chapters we’re going to go through and actually deploy our site to a real, live web server.
You might be tempted to skip this bit—there’s lots of daunting stuff in it, and maybe you think this isn’t what you signed up for. But I strongly urge you to give it a go. This is one of the sections of the book I’m most pleased with, and it’s one that people often write to me saying they were really glad they stuck through it.
If you’ve never done a server deployment before, it will demystify a whole world for you, and there’s nothing like the feeling of seeing your site live on the actual internet. Give it a buzzword name like "DevOps" if that’s what it takes to convince you it’s worth it.
TDD and the Danger Areas of Deployment
Deploying a site to a live web server can be a tricky topic. Oft-heard is the forlorn cry "but it works on my machine!"
Some of the danger areas of deployment include:
- Networking
-
Once we’re off our own machine, networking issues come in: making sure that DNS is routing our domain to the correct IP address for our server, making sure our server is configured to listen to traffic coming in from the world, making sure it’s using the right ports, and making sure any firewalls in the way are configured to let traffic through.
- Dependencies
-
We need to make sure that the packages our software relies on (Python, Django, and so on) are installed on the server, and have the correct versions.
- The database
-
There can be permissions and path issues, and we need to be careful about preserving data between deploys.
- Static files (CSS, JavaScript, images, etc.)
-
Web servers usually need special configuration for serving these.
- Security and Configuration
-
Once we’re on the public internet, we need to worry more about security. Various settings that are really useful for local development (like the Django debug page) become dangerous in production (because they expose our source code in tracebacks).
One way to approach the problem is to get a server, and start manually configuring and installing everything, hacking about until it works, and maybe think about automating things later[1].
But if there’s one thing we’ve learned in the world of agile/lean software development, it’s that taking smaller steps usually pays off.
How can we take smaller, safer steps towards a production deployment? Can we simulate the process of moving to a server, so that we can iron out all the bugs, before we actually take the plunge? Can we then make small changes one at a time, solving problems one by one, rather than having to bite off everything in one mouthful?
Absolutely we can. And from the title of the chapter, I’m sure you’re already guessing that Docker is going to be part of the answer.
Docker, Containers and Virtualization
Docker is a commercial product that wraps several free and open source technologies from the world of Linux, sometimes referred to as "containerization". (Feel free to skip this section if you already know all about Docker.)
You may have already heard of the idea of "virtualization", which allows a single physical computer to pretend to be several machines. Pioneered by IBM (amongst others) on mainframes in the 1960s, it rose to mainstream adoption in the 90s, where it was sold as a way to optimise resource usage in datacentres. AWS, for example, was an offshoot of Amazon, who were using virtualization already, and realised they could sell some spare capacity on their servers to customers outside the business.
So when you come to deploy your code to a real server in a datacentre, it will be using virtualization. And actually you can use virtualization on your own machine, with software like Virtualbox or KVM.
But that can be fiddly to set up! And nowadays, thanks to containerization, we can do better. Because containerization is a kind of even-more-virtual virtualization.
Conceptually, "regular" virtualization works at the hardware level: it gives you multiple virtual machines (VMs) that pretend to be physical computers, on a single real machine. So you can run multiple operating systems using separate VMs on the same physical box.
Containerization work at the operating system level: it gives you multiple virtual operating systems that all run on a single real OS. It lets us pack the source code and its dependencies together, the entire environment required to run the application. So you can run programs inside separate virtual environments, using a single real host operating system and kernel.
Have a look at Docker’s resources on containers for more explanation, The upshot of this is that containers are much "cheaper". You can start one up in milliseconds, and you can run hundreds on the same machine.
Docker and your CV
That’s all well and good for the theoretical justification. But let’s get to the real reason for using this technology, which, as always, is: "it’s fashionable so it’s going to look good on my CV."
For the purposes of this book, that’s not such a bad justification really!
Yes I think it’s going to be a nice way to have a "pretend" deployment on our own machine, before we try the real one—but also, containers are so popular nowadays, that it’s very likely that you’re going to encounter them at work (if you haven’t already). For many working developers, a container image is the final artifact of their work, it’s what they "deliver", and most of the rest of the deployment process is taken care of by someone else.
Docker and the Danger Areas of Deployment
How will containerizing our software help with the danger areas?
-
Containers can be like little virtual servers and this is how we will use them, so they will force us to address many of the problems like dependency management and configuration.
-
We can use the containers to package up as much of the functionality of our application as possible, like a production-ready web server and static files system. This in turn will minimise the amount of configuration we need to do to our actual servers.
-
We can test our containers work by running our functional tests against them.
-
Later, when we deploy our containers to a staging server, we can run the FTs against that too.
-
If we automate container creation and deployment to staging, and we’ve tested both those things, then we will have minimised the risk of deployment to production.
An Overview of Our Deployment Procedure
Over these three chapters, I’m going to go through a deployment procedure. It isn’t meant to be the perfect deployment procedure, so please don’t take it as being best practice, or a recommendation—it’s meant to be an illustration, to show the kinds of issues involved in putting code into production, and where testing fits in.
This chapter: Containerizing our software
-
Adapt our FTs so they can run against a container.
-
Build a minimal Dockerfile with everything we need to run our site.
-
Learn how to build and run a container on our machine.
-
Learn how to run our FTs against our container.
-
Get a first cut of our code up and running inside Docker, with passing tests.
Next chapter: Moving to a production-ready configuration
-
Gradually, incrementally change the container configuration to make it production-ready.
-
Regularly re-run the FTs to check we didn’t break anything.
-
Address issues to do with the database, static files, and so on.
Third chapter: Automating deployment to real servers
-
Gradually build up an Ansible playbook to deploy our containers on a real server.
-
Again, use our FTs to check for any problems.
-
Learn how to SSH in to the server to debug things, where to find logs and other useful information.
-
Use Ansible to build an automated script that can deploy our container to staging.
-
Confidently deploy to production once we have a working deployment script for staging.
As Always, Start with a Test
Let’s adapt our functional tests slightly
so that they can run against a standalone server,
instead of the one that LiveServerTestCase creates for us.
We’ll do it by checking for an environment variable
called TEST_SERVER:
import os
[...]

class NewVisitorTest(StaticLiveServerTestCase):

    def setUp(self):
        self.browser = webdriver.Firefox()
        test_server = os.environ.get('TEST_SERVER')  (1)
        if test_server:
            self.live_server_url = 'http://' + test_server  (2)
Do you remember I said that LiveServerTestCase had certain limitations?
Well, one is that it always assumes you want to use its own test server,
which it makes available at self.live_server_url.
I still want to be able to do that sometimes,
but I also want to be able to selectively tell it not to bother,
and to use a real server instead.
| 1 | The way I decided to do it is using an environment variable called
TEST_SERVER. |
| 2 | Here’s the hack: we replace self.live_server_url with the address of
our "real" server. |
| A clarification: in these chapters, we run tests against our Docker container, or against our staging server, but that doesn’t mean we run the tests from Docker or from our staging server. We still run the tests from our own laptop, but they target the place that’s running our code. |
We test that said hack hasn’t broken anything by running the functional tests "normally":
$ python manage.py test functional_tests
[...]
Ran 3 tests in 8.544s

OK
And now we can try them against our docker server URL, which once we’ve done the right docker magic, will be at http://localhost:8888
I’m deliberately choosing a different port to run Dockerised Django on (8888)
from the default port that a local manage.py runserver would choose (8080),
to avoid getting in the situation where I (or the tests) think
we’re looking at Docker, when we’re actually looking at a local runserver
that I’ve left running in some terminal somewhere.
|
I’ll use the --failfast option to exit as soon as a single test fails:
$ TEST_SERVER=localhost:8888 ./manage.py test functional_tests \
    --failfast
[...]
E
======================================================================
ERROR: test_can_start_a_todo_list
(functional_tests.tests.NewVisitorTest.test_can_start_a_todo_list)
 ---------------------------------------------------------------------
Traceback (most recent call last):
  File "...goat-book/functional_tests/tests.py", line 31, in
test_can_start_a_todo_list
    self.browser.get(self.live_server_url)
[...]
selenium.common.exceptions.WebDriverException: Message: Reached error page: abo
ut:neterror?e=connectionFailure&u=http%3A//localhost:8888/&c=UTF-8&
f=regular&d=Firefox%20can%27t%20establish%20a%20connection%20to%20the%20server%
20at%20localhost.


Ran 1 tests in 5.518s

FAILED (errors=1)
| If, on Windows, you see an error saying something like "TEST_SERVER is not recognized as a command", it’s probably because you’re not using Git-Bash. Take another look at the [pre-requisites] section. |
You can see that our tests are failing, as expected, since we’re not running Docker yet. Selenium reports that Firefox is seeing an error and "cannot establish connection to the server", and you can see localhost:8888 in there too.
The FT seems to be testing the right things, so let’s commit:
$ git diff # should show changes to functional_tests.py
$ git commit -am "Hack FT runner to be able to test docker"
Don’t use export to set the TEST_SERVER environment variable;
otherwise, all your subsequent test runs in that terminal will be against staging,
and that can be very confusing if you’re not expecting it.
Setting it explicitly inline each time you run the FTs is best.
|
Making an src Folder
When preparing a codebase for deployment, it’s often convenient to separate out the actual source code of our production app, from the rest of the files that you need in the project. A folder called src is a common convention.
Currently, all our code is source code really, so we move everything into src (we’ll be seeing some new files appearing outside src shortly.[2] )
$ mkdir src
$ git mv functional_tests lists superlists manage.py src
$ git commit -m "Move all our code into a src folder"
Installing Docker
The Docker documentation is pretty good, and you’ll find detailed installation instructions for Windows, Mac, and Linux. Follow those, and then test your installation by running:
$ docker run busybox echo hello world
Unable to find image busybox:latest locally
[...]
latest: Pulling from library/busybox
[...]: Pull complete
Digest: sha256:[...]
Status: Downloaded newer image for busybox:latest
hello world
What’s happened there is that Docker has
-
Searched for a local copy of the "busybox" image and not found it
-
Downloaded the image from DockerHub
-
Created a container based on that image
-
Started up that container, telling it to run
echo hello world -
And we can see it worked!
Cool! We’ll find out more about all of these steps as the chapter progresses.
Building a Docker Image and Running a Docker Container
Docker has the concepts of images as well as containers. An image is essentially a pre-prepared root filesystem, including the operating system, dependencies, and any code you want to run.
Once you have an image, you can run one or many containers that use the same image.
A First Cut of a Dockerfile
Think of a Dockerfile as instructions for setting up a brand new computer, that we’re going to use to run our Django server on. What do we need to do? Something like this, right?
-
Install an operating system
-
Make sure it has Python on it
-
Get our source code onto it
-
Run
python manage.py runserver
We create a new file called Dockerfile in the base folder of our repo,
next to the src/ directory we made earlier:
FROM python:slim  (1)

COPY src /src  (2)

WORKDIR /src  (3)

CMD python manage.py runserver (4)| 1 | The FROM line is usually the first thing in a Dockerfile,
and it says which base image we are starting from.
Docker images are built from other Docker images!
It’s not quite turtles all the way down, but almost.
So this is the equivalent of choosing a base operating system,
but images can actually have lots of software preinstalled too.
You can browse various base images on DockerHub,
we’re using one that’s published by the Python Software Foundation,
called "slim" because it’s as small as possible.
It’s based on a popular version of Linux called Debian,
and of course it comes with Python already installed on it. |
| 2 | The COPY instruction (the uppercase words are called "instructions")
lets you copy files from your own computer into the container image.
We use it to copy all our source code from the newly-created src folder,
into a similarly-named folder at the root of the container image |
| 3 | WORKDIR sets the current working directory for all subsequent commands.
It’s a bit like doing cd /src |
| 4 | Finally the CMD instruction tells docker which command you want it to run
by default, when you start a container based on that image. |
Docker Build
You build an image with docker build <path-containing-dockerfile>
and we’ll use the -t <tagname> argument to "tag" our image
with a memorable name.
It’s typical to invoke docker build from the folder that contains your Dockerfile,
so the last argument is usually .:
$ docker build -t superlists .
[+] Building 1.2s (8/8) FINISHED                            docker:default
 => [internal] load build definition from Dockerfile                  0.0s
 => => transferring dockerfile: 115B                                  0.0s
 => [internal] load .dockerignore                                     0.1s
 => => transferring context: 2B                                       0.0s
 => [internal] load metadata for docker.io/library/python:slim        0.0s
 => [internal] load build context                                     0.2s
 => => transferring context: 68.54kB                                  0.1s
 => [1/3] FROM docker.io/library/python:slim                                                                 0.0s
 => [2/3] COPY src /src                                               0.2
 => [3/3] WORKDIR /src                                                0.1s
 => exporting to image                                                0.0s
 => => exporting layers                                               0.0s
 => => writing image sha256:7b8e1c9fa68e7bad7994fa41e2aca852ca79f01a  0.0s
 => => naming to docker.io/library/superlists                         0.0s
Now we can see our image in the list of docker images on the system:
$ docker images
REPOSITORY    TAG       IMAGE ID       CREATED          SIZE
[...]
superlists    latest    7b8e1c9fa68e   13 minutes ago   155MB
Docker Run
Once you’ve built an image,
you can run one or more containers based on that image, using docker run.
What happens when we run ours?
$ docker run superlists
Traceback (most recent call last):
  File "/src/manage.py", line 11, in main
    from django.core.management import execute_from_command_line
ModuleNotFoundError: No module named 'django'

The above exception was the direct cause of the following exception:

Traceback (most recent call last):
  File "/src/manage.py", line 22, in <module>
    main()
  File "/src/manage.py", line 13, in main
    raise ImportError(
ImportError: Couldn't import Django. Are you sure it's installed and available
on your PYTHONPATH environment variable? Did you forget to activate a virtual
environment?
Ah, we forgot that we need to install Django.
Virtualenv and requirements.txt
Just like on our own machine, a virtualenv is useful in a deployed environment to make sure we have full control over the packages installed for a particular project.
To reproduce our local virtualenv, rather than just manually pip installing things one by one, and having to remember to sync things between local dev and docker, we can "save" the list of packages we’re using by creating a requirements.txt file.[3]
$ pip freeze
asgiref==3.7.2
attrs==23.1.0
certifi==2023.7.22
Django==4.2.7
h11==0.14.0
idna==3.4
outcome==1.3.0.post0
PySocks==1.7.1
selenium==4.15.2
sniffio==1.3.0
sortedcontainers==2.4.0
sqlparse==0.4.4
trio==0.23.1
trio-websocket==0.11.1
urllib3==2.1.0
wsproto==1.2.0
That shows all the packages in our virtualenv. Let’s find Django, and then add it as a single item to our requirements.txt, with its exact version specified:
$ pip freeze | grep -i django
Django==4.2.7
$ pip freeze | grep -i django== >> requirements.txt
# that's a good first cut, let's commit it:
$ git add requirements.txt
$ git commit -m "Add requirements.txt for virtualenv"
You may be wondering why we didn’t add our other dependency,
Selenium, to our requirements,
or why we didn’t just add all the dependencies,
including the "transitive" ones (eg, Django has its own dependencies of asgiref and sqlparse).
As always, I have to gloss over some nuance and tradeoffs, but the short answer is first, Selenium is only a dependency for the tests, not the application code; we’re never going to run the tests directly on our production servers. As to transitive dependencies, they’re fiddly to manage without bringing in more tools, and I didn’t want to do that for this book.[4]
| Itamar Turner-Traurig has a great guide to Docker Packaging for Python Developers, which I cannot recommend highly enough. Read that before you’re too much older. |
In any case, back in our Dockerfile, we can create a virtualenv
just like we did on our own machine with python -m venv,
and then we can use the special -r flag for pip install,
to point it at our requirements file:
FROM python:slim

RUN python -m venv /venv  (1)
ENV PATH="/venv/bin:$PATH"  (2)

COPY requirements.txt requirements.txt  (3)
RUN pip install -r requirements.txt  (4)

COPY src /src

WORKDIR /src

CMD python manage.py runserver| 1 | Here’s where we create our virtualenv |
| 2 | You can’t really "activate" a virtualenv inside a Dockerfile,
so instead we change the system PATH so that the venv versions
of pip and python become the default ones
(this is actually one of the things that activate does, under the hood). |
| 3 | We copy our requirements file in, just like the src folder. |
| 4 | Now we install our dependencies with pip,
pointing it at our requirements.txt.
Notice the -r. |
Forgetting the -r and running pip install requirements.txt
is such a common error, that I recommend you do it right now
and get familiar with the error message
(which is thankfully much more helpful than it used to be).
It’s a mistake I still make, all the time.
|
Successful Run
Let’s do the build and run in a single line.
This is a pattern I used quite often when developing a Dockerfile,
to be able to quickly rebuild and see the effect of a change:
$ docker build -t superlists . && docker run -it superlists
[+] Building 0.2s (11/11) FINISHED                                  docker:default
[...]
 => [internal] load .dockerignore                                   0.1s
 => => transferring context: 2B                                     0.0s
 => [internal] load build definition from Dockerfile                0.0s
 => => transferring dockerfile: 246B                                0.0s
 => [internal] load metadata for docker.io/library/python:slim      0.0s
 => CACHED [1/6] FROM docker.io/library/python:slim                 0.0s
 => [internal] load build context                                   0.0s
 => => transferring context: 4.75kB                                 0.0s
 => [2/6] RUN python -m venv /venv                                  0.0s
 => [3/6] COPY requirements.txt requirements.txt                    0.0s
 => [4/6] RUN pip install -r requirements.txt                       0.0s
 => [5/6] COPY src /src                                             0.0s
 => [6/6] WORKDIR /src                                              0.0s
 => exporting to image                                              0.0s
 => => exporting layers                                             0.0s
 => => writing image sha256:[...]                                   0.0s
 => => naming to docker.io/library/superlists                       0.0s
Watching for file changes with StatReloader
Performing system checks...

System check identified no issues (0 silenced).

You have 19 unapplied migration(s). Your project may not [...]
[...]
Django version 4.2.7, using settings superlists.settings
Starting development server at http://127.0.0.1:8000/
Quit the server with CONTROL-C.
OK, scanning through that, it looks like the server is running!
Make sure you use the -it flags to the Docker run
command when running runserver, or any other tool that expects
to be run in an interactive terminal session,
otherwise you’ll get strange behaviours, including not being able
to interrupt the docker process with Ctrl-C.
See How to Stop a Docker Container for an escape hatch.
|
Using the FT to Check That Our Container Works
Let’s see what our FTs think about this Docker version of our site.
$ TEST_SERVER=localhost:8888 ./src/manage.py test src/functional_tests \
    --failfast
[...]
selenium.common.exceptions.WebDriverException: Message: Reached error page:
about:neterror?e=connectionFailure&u=http%3A//localhost%3A8888/[...]
Nope! What’s going on here? Time for a little debugging.
Debugging a Container Networking Problems
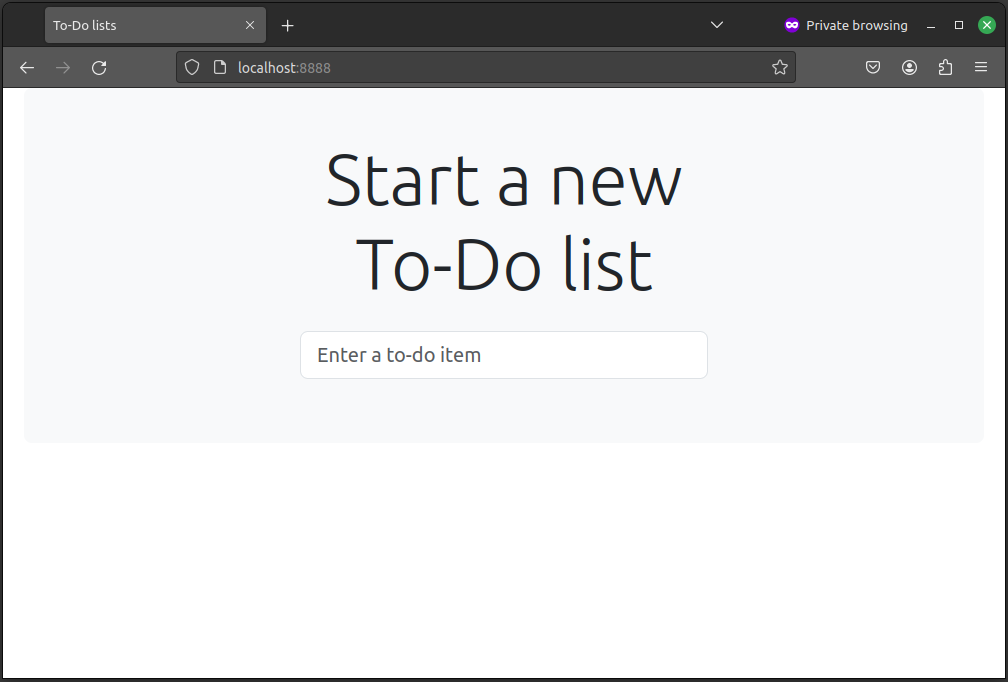
First let’s try and take a look ourselves, in our browser, by going to http://localhost:8888/:

Now let’s take another look at the output from our docker run.
Here’s what appeared right at the end:
Starting development server at http://127.0.0.1:8000/
Quit the server with CONTROL-C.
Aha! We notice that we’re using the wrong port, the default 8000 instead of the 8888
that we specified in the TEST_SERVER env var.
Let’s fix that by amending the CMD instruction in the Dockerfile:
[...]
WORKDIR /src

CMD python manage.py runserver 8888
Ctrl+C the current dockerized container process if it’s still running in your terminal,
then give it another build && run:
$ docker build -t superlists . && docker run -it superlists
[...]
Starting development server at http://127.0.0.1:8888/
Debugging Web Server Connectivity With "curl"
A quick check in our browser will show us that nope, that doesn’t work either.
Let’s try an even lower-level smoke test, the traditional Unix utility curl.
It’s a command-line tool for making HTTP requests. Try it on your own computer first:
$ curl -iv localhost:8888
*   Trying 127.0.0.1:8888...
* connect to 127.0.0.1 port 8888 failed: Connection refused
*   Trying [::1]:8888...
* connect to ::1 port 8888 failed: Connection refused
* Failed to connect to localhost port 8888 after 0 ms: Couldn't connect to server
* Closing connection 0
curl: (7) Failed to connect to localhost port 8888 after 0 ms: Couldn't connect to server
The -iv flag to curl is useful for debugging.
It prints verbose output, as well as full HTTP headers.
|
Running code "inside" the container with docker exec
So, we can’t see Django running on port 8888 when we’re outside the container. What do we see if we run things from inside the container?
We can use docker exec to run commands inside a running container.
First we need to get the name or ID of the container:
$ docker ps
CONTAINER ID   IMAGE        COMMAND                  CREATED          STATUS          PORTS     NAMES
5ed84681fdf8   superlists   "/bin/sh -c 'python …"   12 minutes ago   Up 12 minutes             trusting_wu
Your values for CONTAINER_ID and NAMES will be different from mine,
because they’re randomly generated.
But, make a note of one or the other, and then run docker exec -it <container-id> bash.
On most platforms, you can use tab-completion for the container id or name.
Let’s try it now. Notice that the shell prompt will change from your default Bash prompt
to root@container-id. Watch out for those in future listings,
so that you can be sure of what’s being run inside vs outside containers.
$ docker exec -it container-id-or-name bash
root@5ed84681fdf8:/src# apt-get update && apt-get install -y curl
Get:1 http://deb.debian.org/debian bookworm InRelease [151 kB]
Get:2 http://deb.debian.org/debian bookworm-updates InRelease [52.1 kB]
[...]
Reading package lists... Done
Building dependency tree... Done
Reading state information... Done
The following additional packages will be installed:
  libbrotli1 libcurl4 libldap-2.5-0 libldap-common libnghttp2-14 libpsl5
[...]
root@5ed84681fdf8:/src# curl -iv http://localhost:8888
*   Trying 127.0.0.1:8888...
* Connected to localhost (127.0.0.1) port 8888 (#0)
> GET / HTTP/1.1
> Host: localhost:8888
> User-Agent: curl/7.88.1
> Accept: */*
>
< HTTP/1.1 200 OK
HTTP/1.1 200 OK
[...]
<!doctype html>
<html lang="en">

  <head>
    <title>To-Do lists</title>
    <meta charset="utf-8">
    <meta name="viewport" content="width=device-width, initial-scale=1">
    <link href="/static/bootstrap/css/bootstrap.min.css" rel="stylesheet">
  </head>

  <body>
    [...]
  </body>

</html>
That’s definitely some HTML! And the <title>To-Do lists</title> looks like it’s our html, too.
So, we can see Django is serving our site inside the container, why can’t we see it outside??
Docker Ports Mapping
The pythonspeed guide to Docker’s very first section is called Connection Refused, so I’ll refer you there once again for an excellent, detailed explanation.
But in short, Docker runs in its own little world, specifically it has its own little network, so the ports inside the container are different from the ports outside the container, the ones we can see on our host machine.
So we need to tell Docker to connect the internal ports to the outside ones, to "publish" or "map" them, in Docker terminology.
docker run takes a -p argument, with the syntax OUTSIDE:INSIDE.
So you can actually map a different port number on the inside and outside.
But we’re just mapping 8888 to 8888, and that will look like this:
$ docker build -t superlists . && docker run -p 8888:8888 -it superlists
Now that will change the error we see, but only quite subtly (see Cannot connect on that port). Things clearly aren’t working yet.

Similarly, if you try our curl -iv (outside the container) once again,
you’ll see the error has changed from "Failed to connect",
to "Empty reply":
$ curl -iv localhost:8888
*   Trying 127.0.0.1:8888...
* Connected to localhost (127.0.0.1) port 8888 (#0)
> GET / HTTP/1.1
> Host: localhost:8888
> User-Agent: curl/7.88.1
> Accept: */*
>
* Empty reply from server
* Closing connection 0
curl: (52) Empty reply from server
Essential Googling the Error Message
The need to map ports and the -p argument to docker run are something you just learn,
fairly early on in learning Docker. But the next debugging step is quite a bit more obscure
(although admittedly Itamar does address it in his
docker networking article,
did I already mention how excellent it is?).
But if we haven’t read that, we can always resort to the tried and tested "Googling the error message" technique instead (An indispensable publication (source: https://news.ycombinator.com/item?id=11459601)).

Everyone’s search results are a little different, and mine are perhaps shaped by years of working with Docker and Django, but I found the answer in my very first result (see Google can still deliver results), which was a stackoverflow post.

So we need to tell Django to bind to any IP address, because container networking doesn’t always have 127.0.0.1 as the address of localhost:
[...]
WORKDIR /src

CMD python manage.py runserver 0.0.0.0:8888
Rebuild and re-run your server, and if you have eagle eyes,
you’ll spot it’s binding to 0.0.0.0 instead of 127.0.0.1:
$ docker build -t superlists . && docker run -p 8888:8888 -it superlists
[...]
Starting development server at http://0.0.0.0:8888/
We can verify it’s working with `curl:
$ curl -iv localhost:8888
*   Trying 127.0.0.1:8888...
* Connected to localhost (127.0.0.1) port 8888 (#0)
[...]

  </body>

</html>
* Connection #0 to host localhost left intact
Looking good!
Database migrations
A quick visual inspection confirms—the site is up (The site in Docker is up!)!
Let’s see what our functional tests say:
$ TEST_SERVER=localhost:8888 ./src/manage.py test src/functional_tests \
    --failfast
[...]
E
======================================================================
ERROR: test_can_start_a_todo_list
(functional_tests.tests.NewVisitorTest.test_can_start_a_todo_list)
 ---------------------------------------------------------------------
Traceback (most recent call last):
  File "...goat-book/src/functional_tests/tests.py", line 56, in
test_can_start_a_todo_list
    self.wait_for_row_in_list_table("1: Buy peacock feathers")
  File "...goat-book/src/functional_tests/tests.py", line 26, in
wait_for_row_in_list_table
    table = self.browser.find_element(By.ID, "id_list_table")
            ^^^^^^^^^^^^^^^^^^^^^^^^^^^^^^^^^^^^^^^^^^^^^^^^^
[...]
selenium.common.exceptions.NoSuchElementException: Message: Unable to locate
element: [id="id_list_table"]; For documentation [...]
Although the FTs can connect happily and interact with our site, they are failing as soon as they try to submit a new item.
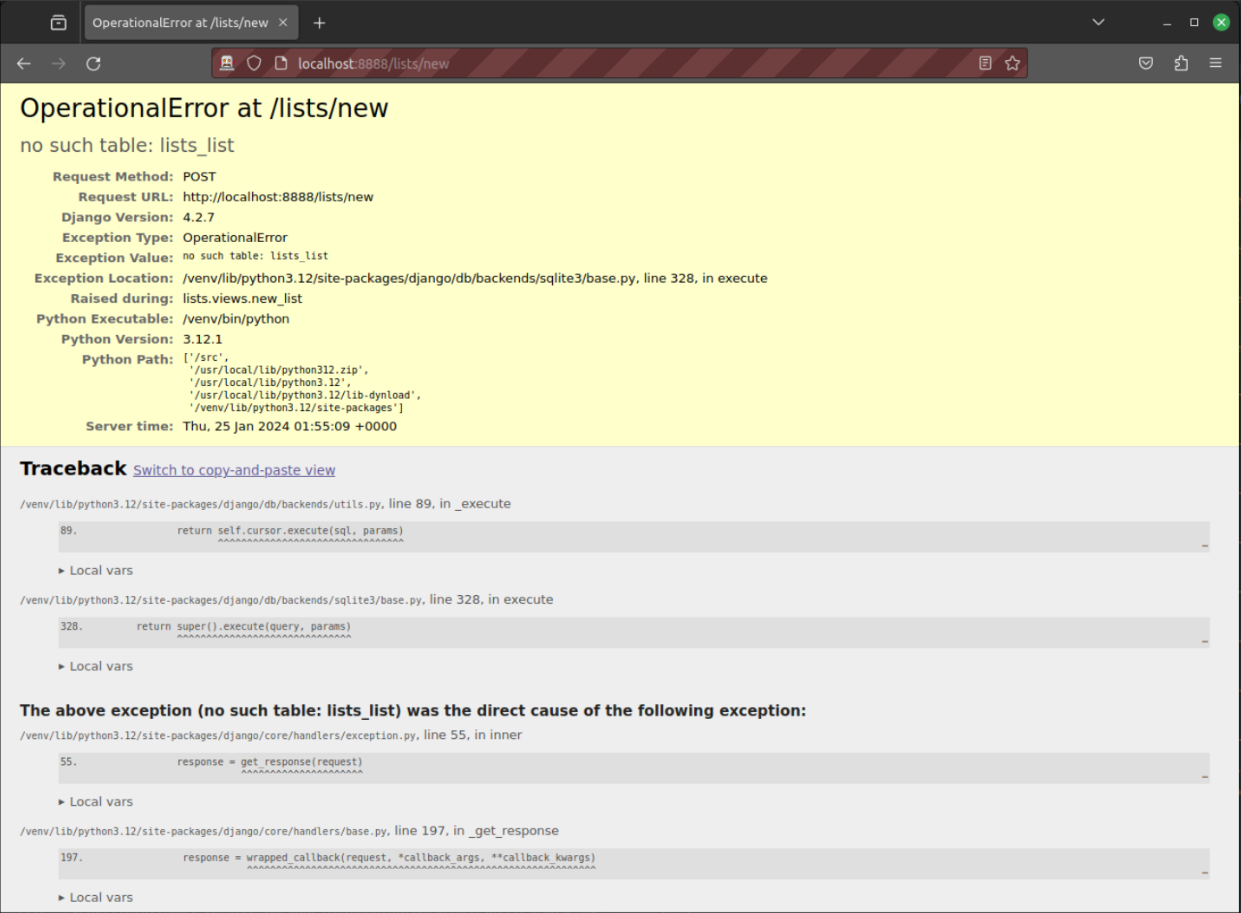
It’s because we haven’t set up the database (which, as you may remember, we highlighted as one of the "danger areas" of deployment). You might have spotted the yellow Django debug page (But the database isn’t) telling us as much, or if you tried it manually.
| The tests saved us from potential embarrassment there. The site looked fine when we loaded its front page. If we’d been a little hasty and only testing manually, we might have thought we were done, and it would have been the first users that discovered that nasty Django DEBUG page. Okay, slight exaggeration for effect, maybe we would have checked, but what happens as the site gets bigger and more complex? You can’t check everything. The tests can. |
To be fair, if you look back through the runserver command output
each time we’ve been starting our container,
you’ll see it’s been warning us about this issue:
You have 19 unapplied migration(s). Your project may not work properly until
you apply the migrations for app(s): auth, contenttypes, lists, sessions.
Run 'python manage.py migrate' to apply them.
If you don’t see this error,
it’s because your src folder had the database file in it, unlike mine.
For the sake of argument, run rm src/db.sqlite3 and re-run the build & run commands,
and you should be able to repro the error. I promise it’s instructive!
|
Should we run "migrate" inside the Dockerfile? No.
So, should we include manage.py migrate in our Dockerfile?
If you try it, you’ll find it certainly fixes the problem:
[...]
WORKDIR /src

RUN python manage.py migrate --noinput  (1)
CMD python manage.py runserver| 1 | We run migrate using the --noinput argument to suppress any little "are you sure" prompts. |
If we try our FTs again, they all pass!
$ TEST_SERVER=localhost:8888 ./src/manage.py test src/functional_tests \
    --failfast
Found 3 test(s).
Creating test database for alias 'default'...
System check identified no issues (0 silenced).
...
 ---------------------------------------------------------------------
Ran 3 tests in 26.965s

OK
Mounting files inside the container.
But we don’t actually want to package up our database inside the image, do we? We want the database on the server to have totally separate data from the one on our machine.
In most deployments, you’d probably be talking to a separate database server, like postgres.
For the purposes of this book, the easiest analogy to a server that’s "outside" our container, is to access the database from the filesystem outside the container.
That also gives us a convenient excuse to talk about mounting files in Docker, which is a very useful thing to be able to do ™.
First let’s revert our change:
[...]
WORKDIR /src

CMD python manage.py runserver
The extra flag to add is --mount,
where we specify type=bind, the source path on our machine,
and the target path inside the container:
$ ./src/manage.py migrate --noinput
Operations to perform:
  Apply all migrations: auth, contenttypes, lists, sessions
Running migrations:
  Applying contenttypes.0001_initial... OK
[...]
  Applying sessions.0001_initial... OK
$ docker build -t superlists . && docker run \
  -p 8888:8888 \
  --mount type=bind,source=./src/db.sqlite3,target=/src/db.sqlite3 \
  -it superlists
The old syntax for mounts was -v.
One of the advantages of the new --mount syntax is that it will fail hard
if the path you’re trying to mount into the container does not exist
(it says something like bind source path does not exist)
This avoids a lot of pain, ask me how I now this.
|
And we check the FTs again.
$ TEST_SERVER=localhost:8888 ./src/manage.py test src/functional_tests \
    --failfast
Found 3 test(s).
Creating test database for alias 'default'...
System check identified no issues (0 silenced).
...
 ---------------------------------------------------------------------
Ran 3 tests in 26.965s

OK
AMAZING IT ACTUALLY WORKSSSSSSSS.
Ahem, that’s definitely good enough for now! Let’s commit.
$ git add Dockerfile
$ git commit -m"First cut of a Dockerfile"
Phew. Well, it took a bit of hacking about, but now we can be reassured that the basic Docker plumbing works. Notice that the FT was able to guide us incrementally towards a working config, and spot problems early on (like the missing database).
But we really can’t be using the Django dev server in production, or running on port 8888 forever. In the next chapter, we’ll make our hacky image more production-ready.
But first, time for a well-earned tea break I think, and perhaps a chocolate biscuit.
Comments