Prettification: Layout and Styling, and What to Test About It
We’re starting to think about releasing the first version of our site, but we’re a bit embarrassed by how ugly it looks at the moment. In this chapter, we’ll cover some of the basics of styling, including integrating an HTML/CSS framework called Bootstrap. We’ll learn how static files work in Django, and what we need to do about testing them.
Testing Layout and Style
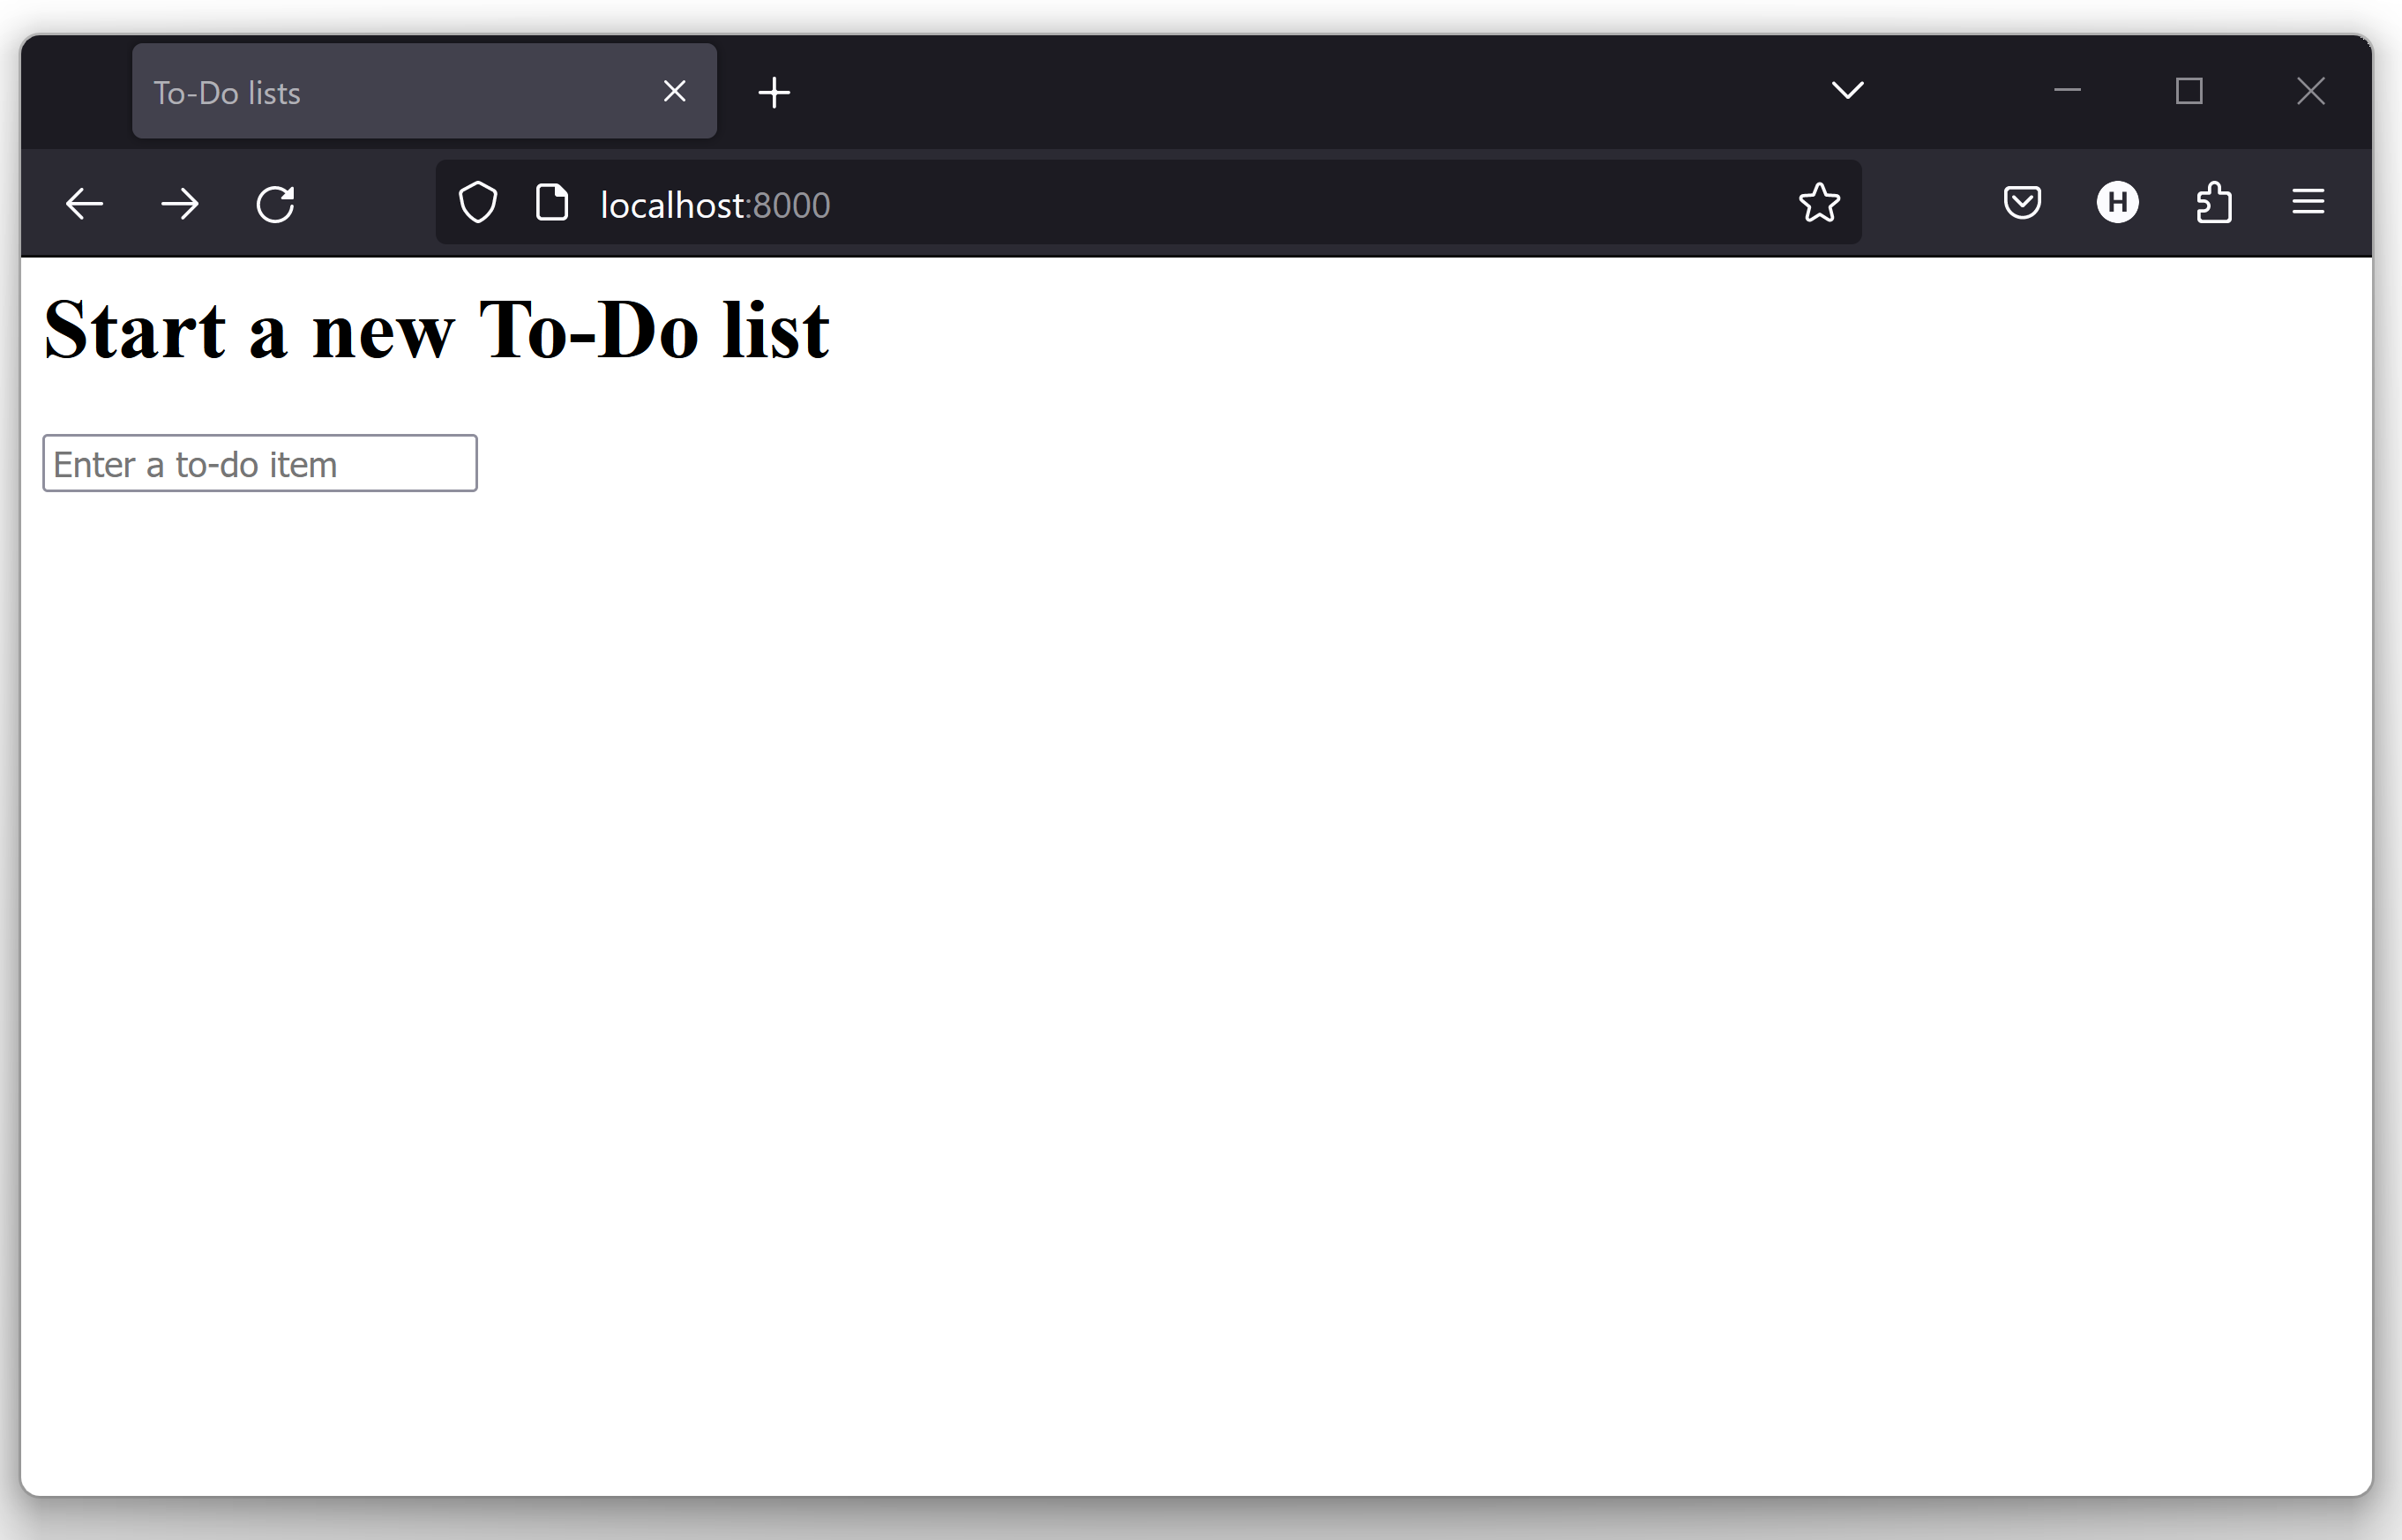
Our site is undeniably a bit unattractive at the moment (Our home page, looking a little ugly…).
If you spin up your dev server with manage.py runserver,
you may run into a database error, something like this:
"table lists_item has no column named list_id".
You need to update your local database
to reflect the changes we made in models.py.
Use manage.py migrate.
If it gives you any grief about IntegrityErrors,
just delete the database file[1]
and try again.
|
We can’t be adding to Python’s reputation for being ugly, so let’s do a tiny bit of polishing. Here are a few things we might want:
-
A nice large input field for adding new and existing lists
-
A large, attention-grabbing, centered box to put it in
How do we apply TDD to these things? Most people will tell you you shouldn’t test aesthetics, and they’re right. It’s a bit like testing a constant, in that tests usually wouldn’t add any value.
But we can test the essential behaviour of our aesthetics, i.e., that we have any at all. All we want to do is reassure ourselves that things are working. For example, we’re going to use Cascading Style Sheets (CSS) for our styling, and they are loaded as static files. Static files can be a bit tricky to configure (especially, as we’ll see later, when you move off your own computer and onto a hosting site), so we’ll want some kind of simple "smoke test" that the CSS has loaded. We don’t have to test fonts and colours and every single pixel, but we can do a quick check that the main input box is aligned the way we want it on each page, and that will give us confidence that the rest of the styling for that page is probably loaded too.
Let’s add a new test method inside our functional test:
class NewVisitorTest(LiveServerTestCase):
    [...]


    def test_layout_and_styling(self):
        # Edith goes to the home page,
        self.browser.get(self.live_server_url)

        # Her browser window is set to a very specific size
        self.browser.set_window_size(1024, 768)

        # She notices the input box is nicely centered
        inputbox = self.browser.find_element(By.ID, "id_new_item")
        self.assertAlmostEqual(
            inputbox.location["x"] + inputbox.size["width"] / 2,
            512,
            delta=10,
        )
A few new things here.
We start by setting the window size to a fixed size.
We then find the input element,
look at its size and location,
and do a little maths
to check whether it seems to be positioned in the middle of the page.
assertAlmostEqual helps us to deal with rounding errors
and the occasional weirdness due to scrollbars and the like,
by letting us specify that we want our arithmetic to work
to within plus or minus 10 pixels.
If we run the functional tests, we get:
$ python manage.py test functional_tests
[...]
.F.
======================================================================
FAIL: test_layout_and_styling
(functional_tests.tests.NewVisitorTest.test_layout_and_styling)
 ---------------------------------------------------------------------
Traceback (most recent call last):
  File "...goat-book/functional_tests/tests.py", line 120, in
test_layout_and_styling
    self.assertAlmostEqual(
AssertionError: 102.5 != 512 within 10 delta (409.5 difference)

 ---------------------------------------------------------------------
Ran 3 tests in 9.188s

FAILED (failures=1)
That’s the expected failure. Still, this kind of FT is easy to get wrong, so let’s use a quick-and-dirty "cheat" solution, to check that the FT definitely passes when the input box is centered. We’ll delete this code again almost as soon as we’ve used it to check the FT:
<form method="POST" action="/lists/new">
  <p style="text-align: center;">
    <input name="item_text" id="id_new_item" placeholder="Enter a to-do item" />
  </p>
  {% csrf_token %}
</form>
That passes, which means the FT works. Let’s extend it to make sure that the input box is also center-aligned on the page for a new list:
    # She starts a new list and sees the input is nicely
    # centered there too
    inputbox.send_keys("testing")
    inputbox.send_keys(Keys.ENTER)
    self.wait_for_row_in_list_table("1: testing")
    inputbox = self.browser.find_element(By.ID, "id_new_item")
    self.assertAlmostEqual(
        inputbox.location["x"] + inputbox.size["width"] / 2,
        512,
        delta=10,
    )
That gives us another test failure:
  File "...goat-book/functional_tests/tests.py", line 132, in
test_layout_and_styling
    self.assertAlmostEqual(
AssertionError: 102.5 != 512 within 10 delta (409.5 difference)
Let’s commit just the FT:
$ git add functional_tests/tests.py
$ git commit -m "first steps of FT for layout + styling"
Now it feels like we’re justified in finding a "proper" solution
to our need for some better styling for our site.
We can back out our hacky text-align: center:
$ git reset --hard
WARNING: git reset --hard
is the "take off and nuke the site from orbit"
Git command, so be careful with it—it
blows away all your un-committed changes.
Unlike almost everything else you can do with Git,
there’s no way of going back after this one.
Prettification: Using a CSS Framework
UI design is hard, and doubly so now that we have to deal with mobile, tablets, and so forth. That’s why many programmers, particularly lazy ones like me, turn to CSS frameworks to solve some of those problems for them. There are lots of frameworks out there, but one of the earliest and most popular still, is Bootstrap. Let’s use that.
You can find bootstrap at getbootstrap.com.
We’ll download it and put it in a new folder called static inside the lists
app:[2]
$ wget -O bootstrap.zip https://github.com/twbs/bootstrap/releases/download/\
v5.3.0/bootstrap-5.3.0-dist.zip
$ unzip bootstrap.zip
$ mkdir lists/static
$ mv bootstrap-5.3.0-dist lists/static/bootstrap
$ rm bootstrap.zip
Bootstrap comes with a plain, uncustomised installation in the dist folder. We’re going to use that for now, but you should really never do this for a real site—vanilla Bootstrap is instantly recognisable, and a big signal to anyone in the know that you couldn’t be bothered to style your site. Learn how to use Sass and change the font, if nothing else! There is info in Bootstrap’s docs, or read an introductory guide.
Our lists folder will end up looking like this:
$ tree lists
lists
├── __init__.py
├── admin.py
├── apps.py
├── migrations
│   ├── [...]
├── models.py
├── static
│   └── bootstrap
│       ├── css
│       │   ├── bootstrap-grid.css
│       │   ├── bootstrap-grid.css.map
│       │   ├── [...]
│       │   └── bootstrap.rtl.min.css.map
│       └── js
│           ├── bootstrap.bundle.js
│           ├── bootstrap.bundle.js.map
│           ├── [...]
│           └── bootstrap.min.js.map
├── templates
│   ├── home.html
│   └── list.html
├── [...]
Look at the "Getting Started" section of the Bootstrap documentation; you’ll see it wants our HTML template to include something like this:
<!doctype html>
<html lang="en">
  <head>
    <meta charset="utf-8">
    <meta name="viewport" content="width=device-width, initial-scale=1">
    <title>Bootstrap demo</title>
  </head>
  <body>
    <h1>Hello, world!</h1>
  </body>
</html>
We already have two HTML templates. We don’t want to be adding a whole load of boilerplate code to each, so now feels like the right time to apply the "Don’t repeat yourself" rule, and bring all the common parts together. Thankfully, the Django template language makes that easy using something called template inheritance.
Django Template Inheritance
Let’s have a little review of what the differences are between home.html and list.html:
$ diff lists/templates/home.html lists/templates/list.html
<     <h1>Start a new To-Do list</h1>
<     <form method="POST" action="/lists/new">
---
>     <h1>Your To-Do list</h1>
>     <form method="POST" action="/lists/{{ list.id }}/add_item">
[...]
>     <table id="id_list_table">
>       {% for item in list.item_set.all %}
>         <tr><td>{{ forloop.counter }}: {{ item.text }}</td></tr>
>       {% endfor %}
>     </table>
They have different header texts, and their forms use different URLs. On top
of that, list.html has the additional <table> element.
Now that we’re clear on what’s in common and what’s not, we can make the two templates inherit from a common "superclass" template. We’ll start by making a copy of list.html:
$ cp lists/templates/list.html lists/templates/base.html
We make this into a base template which just contains the common boilerplate, and mark out the "blocks", places where child templates can customise it:
<html>
  <head>
    <title>To-Do lists</title>
  </head>

  <body>
    <h1>{% block header_text %}{% endblock %}</h1>

    <form method="POST" action="{% block form_action %}{% endblock %}">
      <input name="item_text" id="id_new_item" placeholder="Enter a to-do item" />
      {% csrf_token %}
    </form>

    {% block table %}
    {% endblock %}
  </body>

</html>
The base template defines a series of areas called "blocks", which will be places that other templates can hook in and add their own content. Let’s see how that works in practice, by changing home.html so that it "inherits from" base.html:
{% extends 'base.html' %}

{% block header_text %}Start a new To-Do list{% endblock %}

{% block form_action %}/lists/new{% endblock %}
You can see that lots of the boilerplate HTML disappears, and we just concentrate on the bits we want to customise. We do the same for list.html:
{% extends 'base.html' %}

{% block header_text %}Your To-Do list{% endblock %}

{% block form_action %}/lists/{{ list.id }}/add_item{% endblock %}

{% block table %}
  <table id="id_list_table">
    {% for item in list.item_set.all %}
      <tr><td>{{ forloop.counter }}: {{ item.text }}</td></tr>
    {% endfor %}
  </table>
{% endblock %}
That’s a refactor of the way our templates work. We rerun the FTs to make sure we haven’t broken anything:
AssertionError: 102.5 != 512 within 10 delta (409.5 difference)
Sure enough, they’re still getting to exactly where they were before.
That’s worthy of a commit:
$ git diff -w
# the -w means ignore whitespace, useful since we've changed some html indenting
$ git status
$ git add lists/templates # leave static, for now
$ git commit -m "refactor templates to use a base template"
Integrating Bootstrap
Now it’s much easier to integrate the boilerplate code that Bootstrap wants—we won’t add the JavaScript yet, just the CSS:
<!doctype html>
<html lang="en">

  <head>
    <title>To-Do lists</title>
    <meta charset="utf-8">
    <meta name="viewport" content="width=device-width, initial-scale=1">
    <link href="css/bootstrap.min.css" rel="stylesheet">
  </head>
[...]
Rows and Columns
Finally, let’s actually use some of the Bootstrap magic!
You’ll have to read the documentation yourself,
but we should be able to use a combination
of the grid system and the justify-content-center class to get what we want:
  <body>
    <div class="container">

      <div class="row justify-content-center">
        <div class="col-lg-6 text-center">
          <h1>{% block header_text %}{% endblock %}</h1>

          <form method="POST" action="{% block form_action %}{% endblock %}" >
            <input
              name="item_text"
              id="id_new_item"
              placeholder="Enter a to-do item"
            />
            {% csrf_token %}
          </form>
        </div>
      </div>

      <div class="row justify-content-center">
        <div class="col-lg-6">
          {% block table %}
          {% endblock %}
        </div>
      </div>

    </div>
  </body>
(If you’ve never seen an HTML tag broken up over several lines,
that <input> may be a little shocking.
It is definitely valid,
but you don’t have to use it if you find it offensive. ;)
| Take the time to browse through the Bootstrap documentation, if you’ve never seen it before. It’s a shopping trolley brimming full of useful tools to use in your site. |
Does that work?
AssertionError: 102.5 != 512 within 10 delta (409.5 difference)
Hmm. No. Why isn’t our CSS loading?
Static Files in Django
Django, and indeed any web server, needs to know two things to deal with static files:
-
How to tell when a URL request is for a static file, as opposed to for some HTML that’s going to be served via a view function
-
Where to find the static file the user wants
In other words, static files are a mapping from URLs to files on disk.
For item 1, Django lets us define a URL "prefix" to say that any URLs which start with that prefix should be treated as requests for static files. By default, the prefix is /static/. It’s defined in settings.py:
[...]

# Static files (CSS, JavaScript, Images)
# https://docs.djangoproject.com/en/4.2/howto/static-files/

STATIC_URL = "static/"
The rest of the settings we will add to this section all have to do with item 2: finding the actual static files on disk.
While we’re using the Django development server (manage.py runserver),
we can rely on Django to magically find static files for us—it’ll
just look in any subfolder of one of our apps called static.
You now see why we put all the Bootstrap static files into lists/static.
So why are they not working at the moment?
It’s because we’re not using the /static/ URL prefix.
Have another look at the link to the CSS in base.html:
<link href="css/bootstrap.min.css" rel="stylesheet">That href is just what happened to be in the bootstrap docs.
To get it to work, we need to change it to:
<link href="/static/bootstrap/css/bootstrap.min.css" rel="stylesheet">Now when runserver sees the request,
it knows that it’s for a static file because it begins with /static/.
It then tries to find a file called bootstrap/css/bootstrap.min.css,
looking in each of our app folders for subfolders called static,
and it should find it at lists/static/bootstrap/css/bootstrap.min.css.
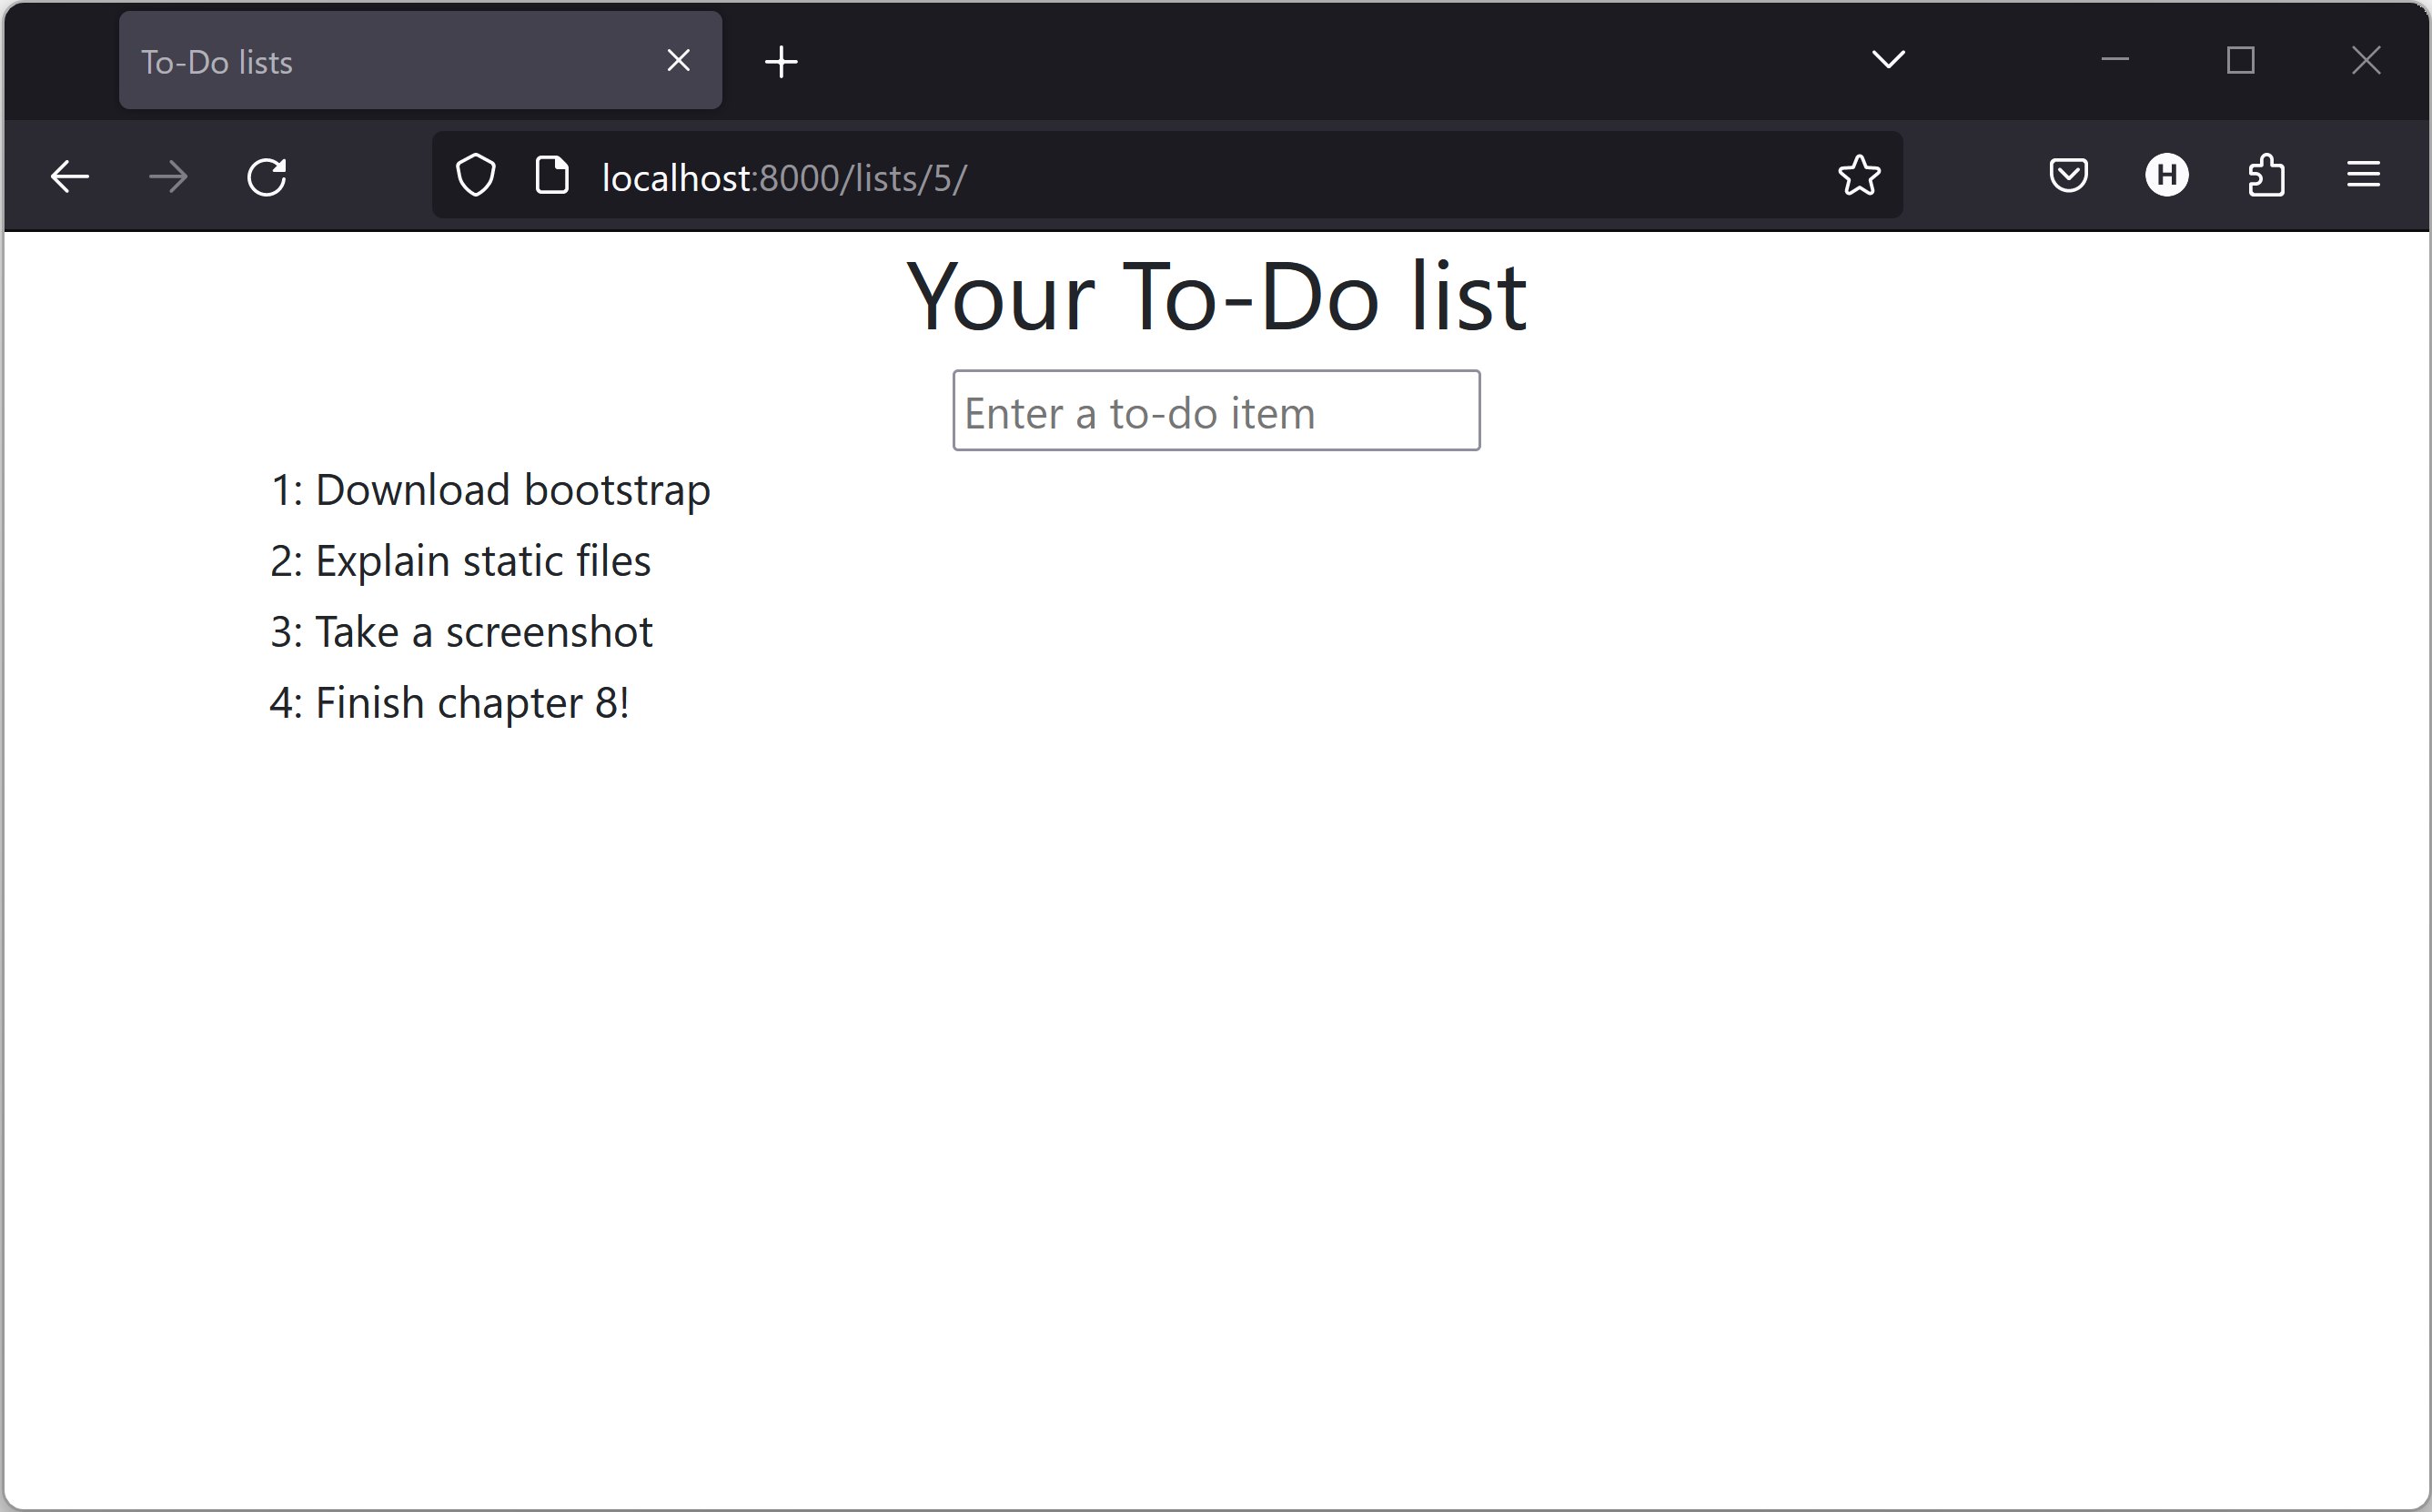
So if you take a look manually, you should see it works, as in Our site starts to look a little better….
Switching to StaticLiveServerTestCase
If you run the FT though, annoyingly, it still won’t pass:
AssertionError: 102.5 != 512 within 10 delta (409.5 difference)
That’s because, although runserver automagically finds static files,
LiveServerTestCase doesn’t.
Never fear, though:
the Django developers have made an even more magical test class
called StaticLiveServerTestCase
(see the docs).
Let’s switch to that:
@@ -1,14 +1,14 @@
-from django.test import LiveServerTestCase
+from django.contrib.staticfiles.testing import StaticLiveServerTestCase
 from selenium import webdriver
 from selenium.common.exceptions import WebDriverException
 from selenium.webdriver.common.keys import Keys
 import time

 MAX_WAIT = 10


-class NewVisitorTest(LiveServerTestCase):
+class NewVisitorTest(StaticLiveServerTestCase):

     def setUp(self):
And now it will find the new CSS, which will get our test to pass:
$ python manage.py test functional_tests
Creating test database for alias 'default'...
...
 ---------------------------------------------------------------------
Ran 3 tests in 9.764s
Hooray!
Using Bootstrap Components to Improve the Look of the Site
Let’s see if we can do even better, using some of the other tools in Bootstrap’s panoply.
Jumbotron!
The first version of Bootstrap used to ship with a class called jumbotron
for things that are meant to be particularly prominent on the page.
It doesn’t exist any more, but old-timers like me still pine for it,
so they have a specific page in the docs that tells you how to recreate it.
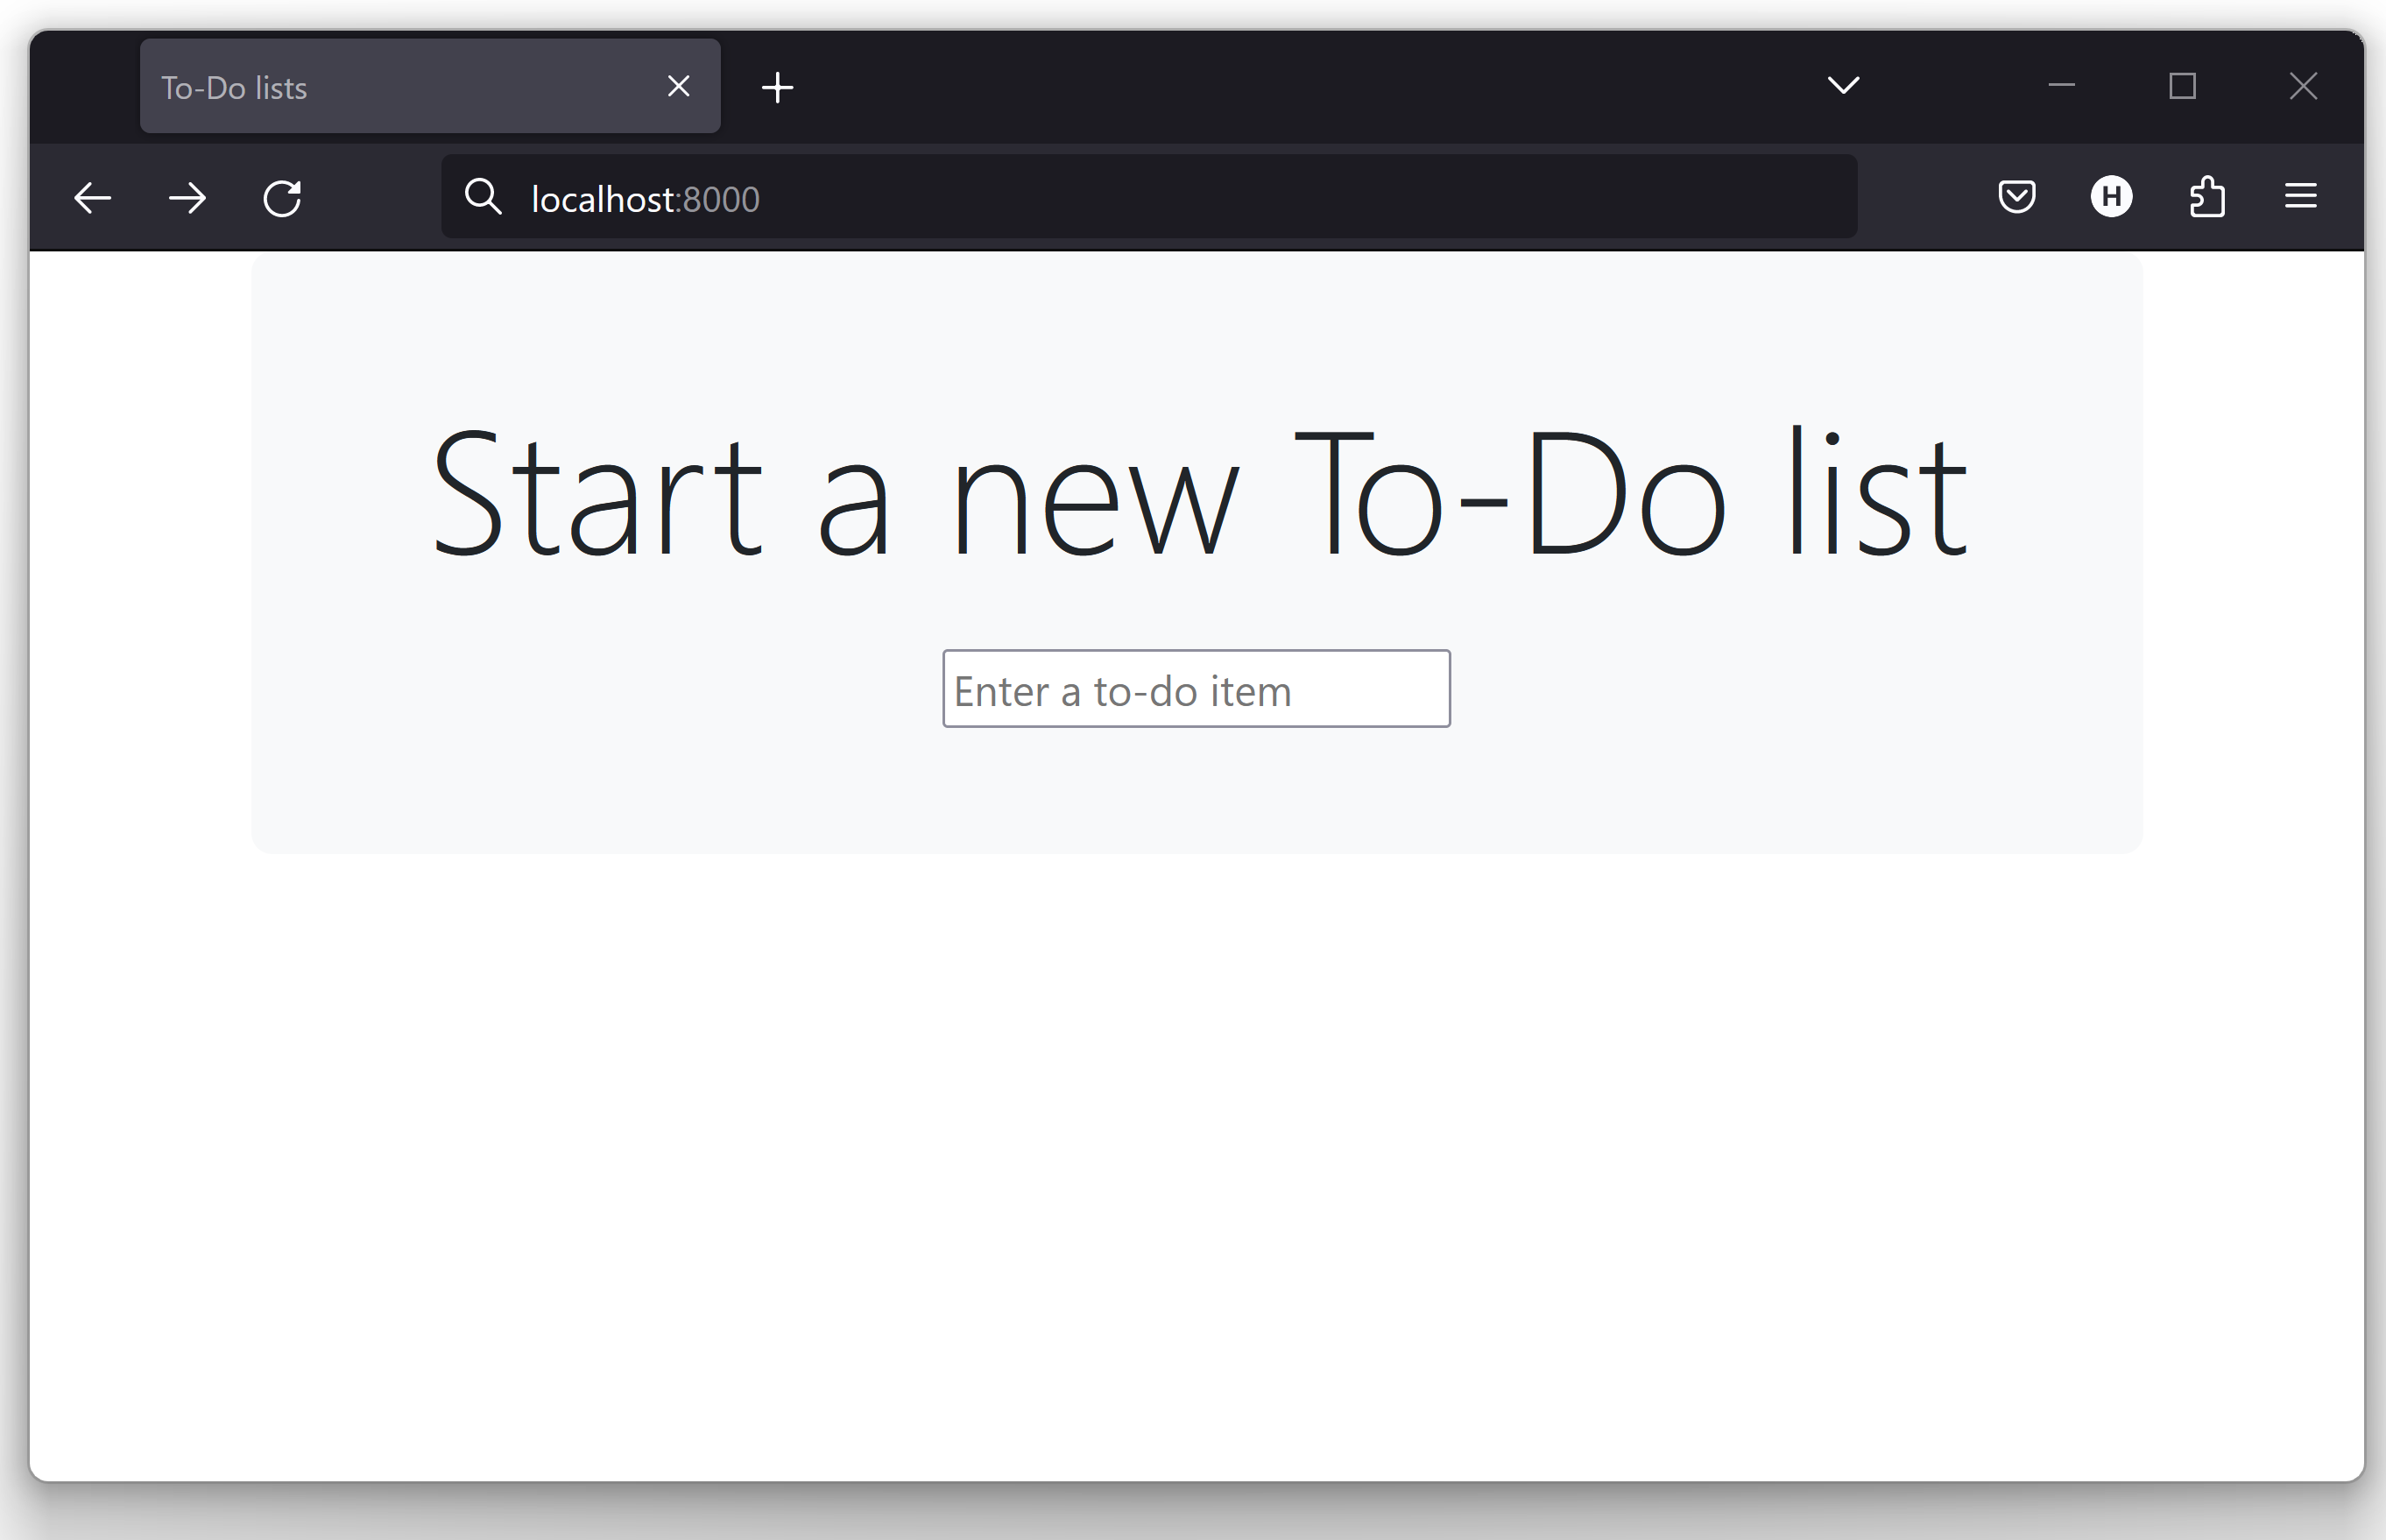
Essentially, we massively embiggen the main page header and the input form, putting it into a grey box with nice rounded corners:
  <body>
    <div class="container">

      <div class="row justify-content-center p-5 bg-body-tertiary rounded-3">
        <div class="col-lg-6 text-center">
          <h1 class="display-1 mb-4">{% block header_text %}{% endblock %}</h1>
          [...]
That ends up looking something like A big grey box at the top of the page:
When hacking about with design and layout,
it’s best to have a window open that we can hit refresh on, frequently.
Use python manage.py runserver to spin up the dev server,
and then browse to http://localhost:8000
to see your work as we go.
|
Large Inputs
The jumbotron is a good start, but now the input box has tiny text compared to everything else. Thankfully, Bootstrap’s form control classes offer an option to set an input to be "large":
    <input
      class="form-control form-control-lg"
      name="item_text"
      id="id_new_item"
      placeholder="Enter a to-do item"
    />
Table Styling
The table text also looks too small compared to the rest of the page now.
Adding the Bootstrap table class improves things, over in list.html:
<table class="table" id="id_list_table">Dark Modeeeeeee
In contrast to my greybeard nostalgia for the Jumbotron, here’s something relatively new to Bootstrap, Dark Mode!
<!doctype html>
<html lang="en" data-bs-theme="dark">
Take a look at The lists page goes dark. I think that looks great!
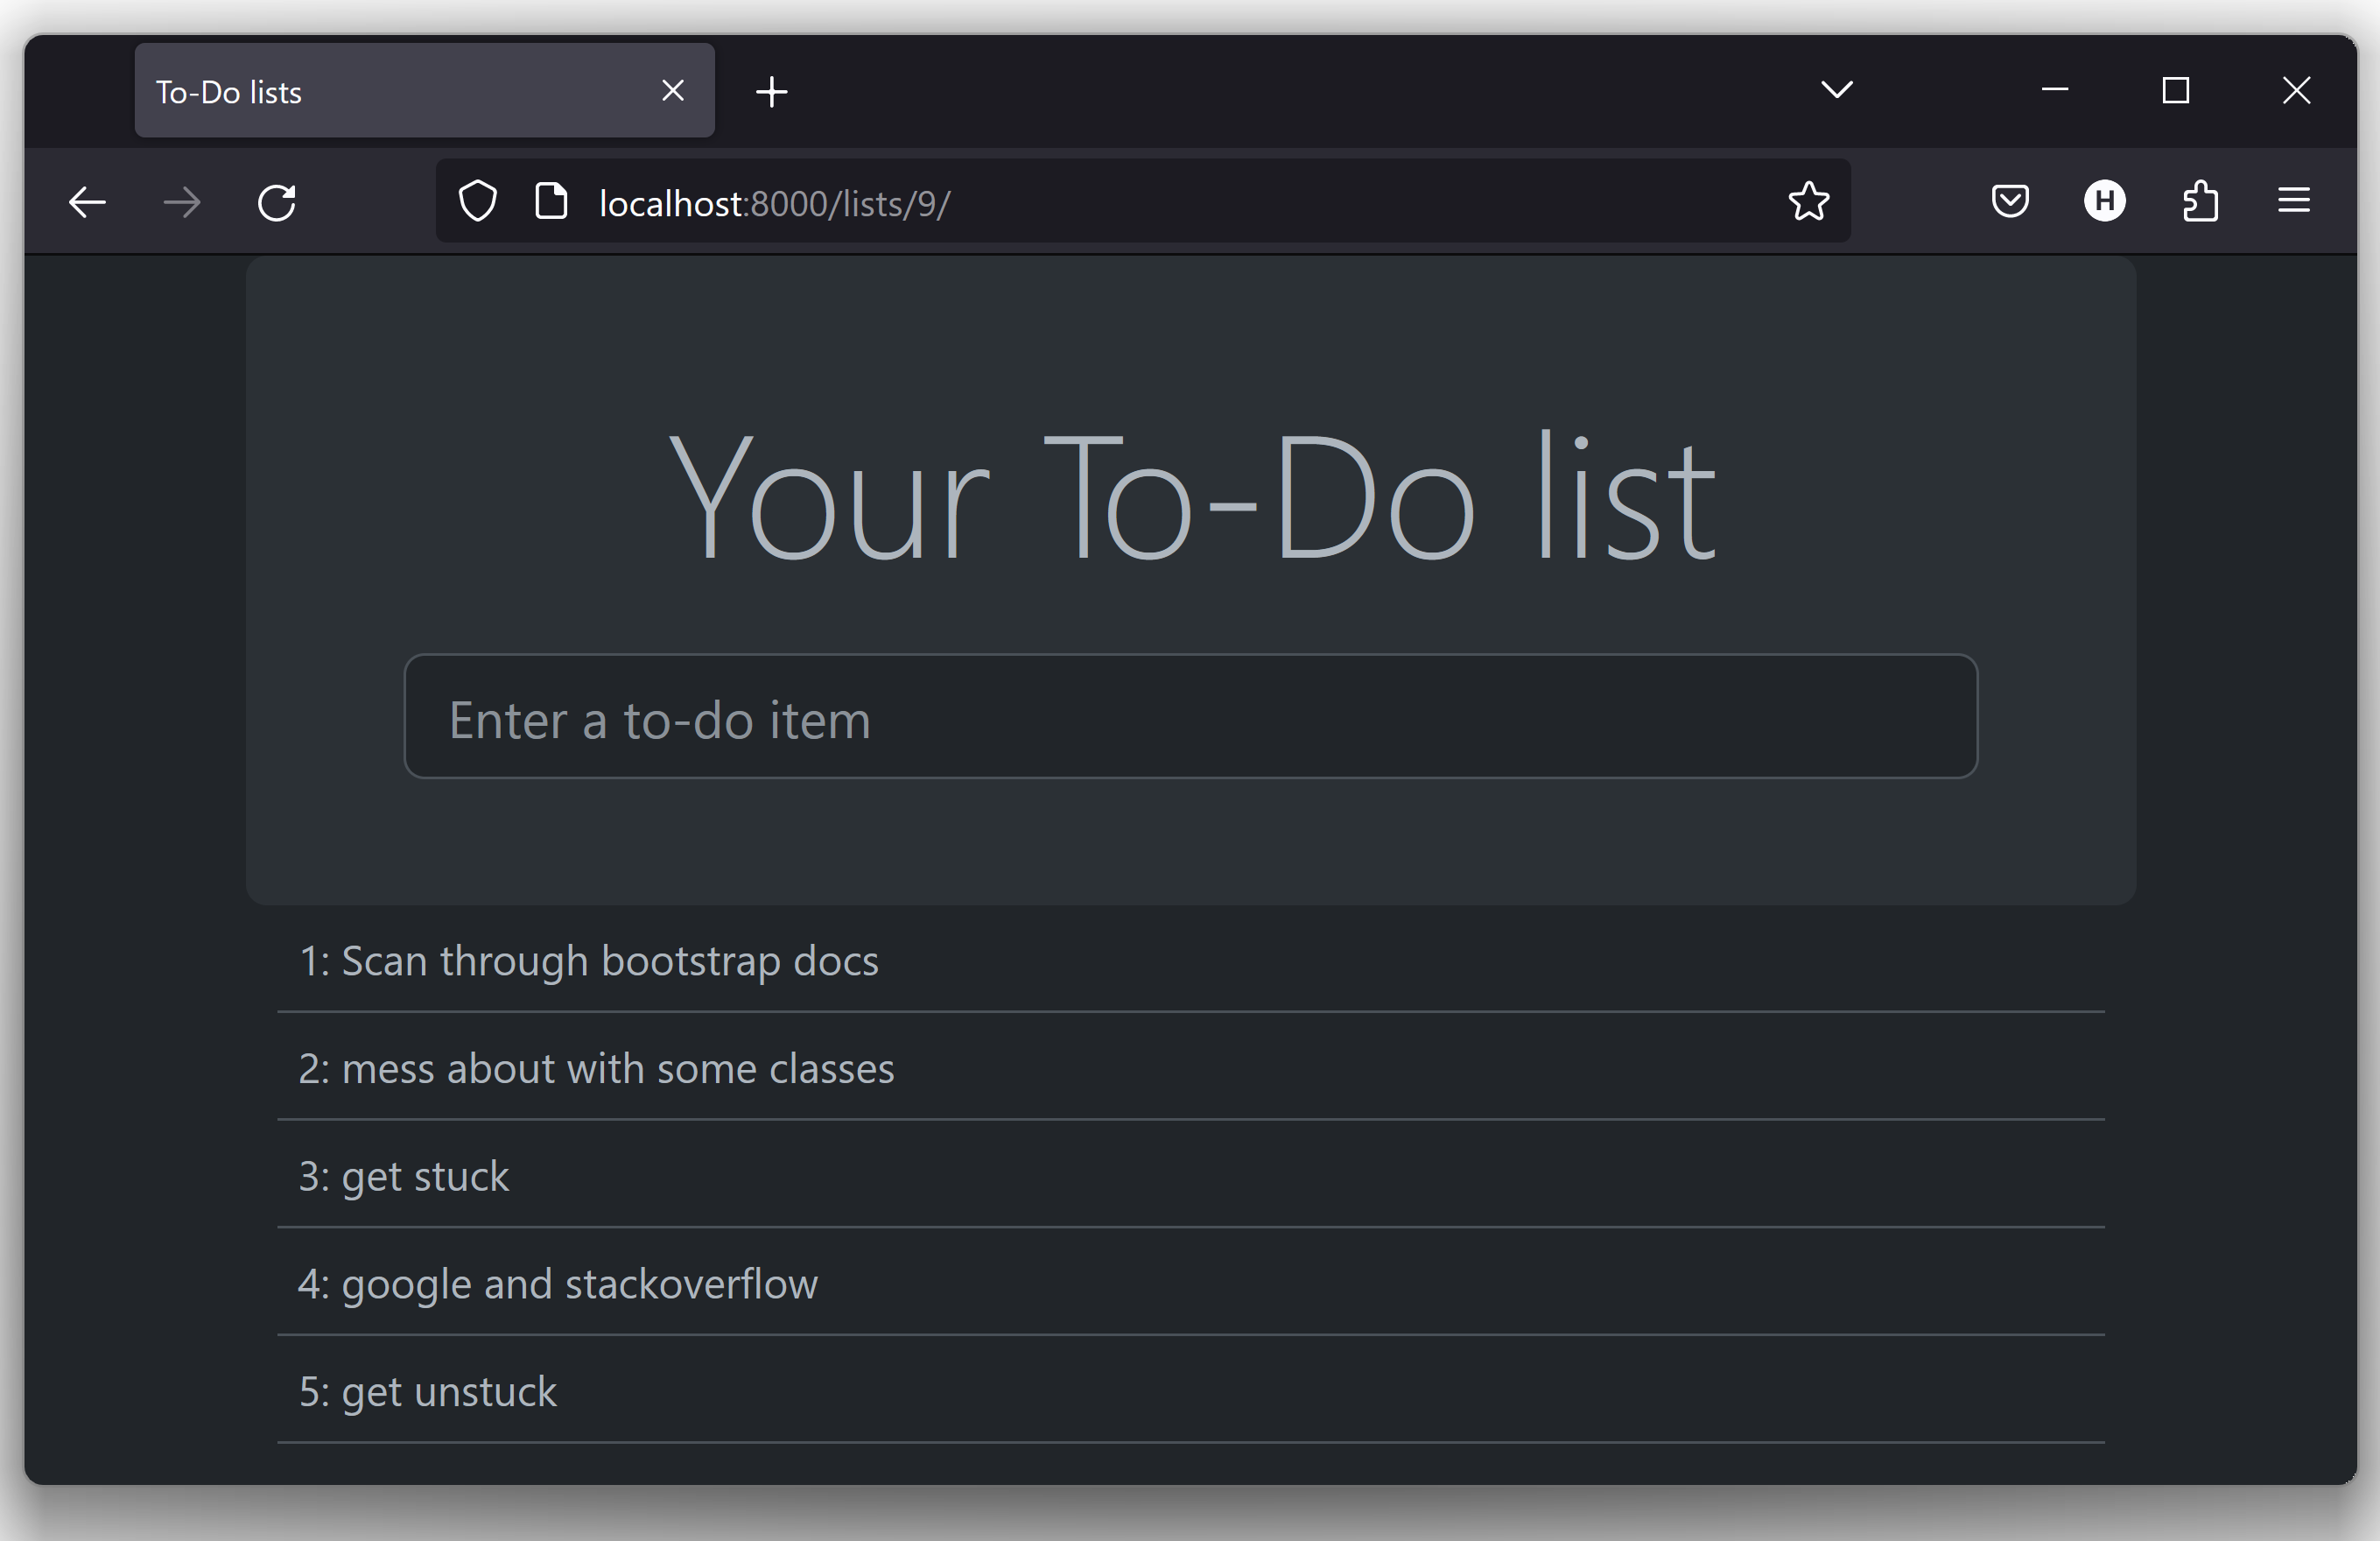
But it’s very much a matter of personal preference, and my editor will kill me if I make all the rest of my screenshots use so much ink, so I’m going to revert it for now. You’re free to keep dark mode on if you like!
A semi-decent page
All that took me a few goes, but I’m reasonably happy with it now (The lists page, looking good enough for now.).
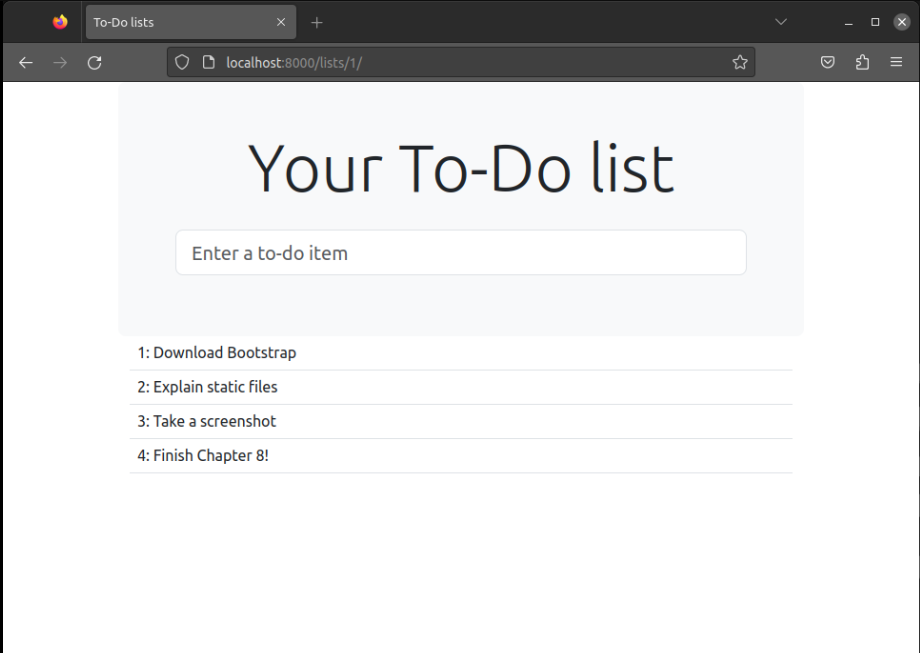
If you want to go further with customising Bootstrap, you need to get into compiling Sass. I’ve said it already, but I definitely recommend taking the time to do that some day. Sass/SCSS is a great improvement on plain old CSS, and a useful tool even if you don’t use Bootstrap.
A last run of the functional tests, to see if everything still works OK:
$ python manage.py test functional_tests
[...]
...
 ---------------------------------------------------------------------
Ran 3 tests in 10.084s

OK
That’s it! Definitely time for a commit:
$ git status # changes tests.py, base.html, list.html, settings.py, + untracked lists/static
$ git add .
$ git status # will now show all the bootstrap additions
$ git commit -m "Use Bootstrap to improve layout"
What We Glossed Over: collectstatic and Other Static Directories
We saw earlier that the Django dev server will magically find all your static files inside app folders, and serve them for you. That’s fine during development, but when you’re running on a real web server, you don’t want Django serving your static content—using Python to serve raw files is slow and inefficient, and a web server like Apache or Nginx can do this all for you. You might even decide to upload all your static files to a CDN, instead of hosting them yourself.
For these reasons, you want to be able to gather up all your static files
from inside their various app folders,
and copy them into a single location, ready for deployment.
This is what the collectstatic command is for.
The destination, the place where the collected static files go,
needs to be defined in settings.py as STATIC_ROOT.
In the next chapter we’ll be doing some deployment,
so let’s actually experiment with that now.
A common and straightforward place to put it
is in a folder called "static" in the root of our repo:
.
├── db.sqlite3
├── functional_tests/
├── lists/
├── manage.py
├── static/
└── superlists/
Here’s a neat way of specifying that folder, making it relative to the location of the project base directory:
# Static files (CSS, JavaScript, Images)
# https://docs.djangoproject.com/en/4.2/howto/static-files/

STATIC_URL = "static/"
STATIC_ROOT = BASE_DIR / "static"
Take a look at the top of the settings file,
and you’ll see how that BASE_DIR variable is helpfully defined for us,
using pathlib.Path and __file__
(both really nice Python builtins)[3].
Anyway, let’s try running collectstatic:
$ python manage.py collectstatic

169 static files copied to '...goat-book/static'.
And if we look in ./static, we’ll find all our CSS files:
$ tree static/
static/
├── admin
│   ├── css
│   │   ├── autocomplete.css
│   │   ├── [...]
[...]
│               └── xregexp.min.js
└── bootstrap
    ├── css
    │   ├── bootstrap-grid.css
    │   ├── [...]
    │   └── bootstrap.rtl.min.css.map
    └── js
        ├── bootstrap.bundle.js
        ├── [...]
        └── bootstrap.min.js.map

17 directories, 169 files
collectstatic has also picked up all the CSS for the admin site.
The admin site is one of Django’s powerful features,
but we don’t need it for our simple site, so let’s disable it for now:
INSTALLED_APPS = [
    # "django.contrib.admin",
    "django.contrib.auth",
    "django.contrib.contenttypes",
    "django.contrib.sessions",
    "django.contrib.messages",
    "django.contrib.staticfiles",
    "lists",
]
And we try again:
$ rm -rf static/
$ python manage.py collectstatic

44 static files copied to '...goat-book/static'.
Much better.
Now we know how to collect all the static files into a single folder, where it’s easy for a web server to find them. We’ll find out all about that, including how to test it, in the next chapter!
For now let’s save our changes to settings.py. We’ll also add the top-level static folder to our gitignore, since it will only contain copies of files we actually keep in individual apps' static folders.
$ git diff # should show changes in settings.py
$ echo /static >> .gitignore
$ git commit -am "set STATIC_ROOT in settings and disable admin"
A Few Things That Didn’t Make It
Inevitably this was only a whirlwind tour of styling and CSS, and there were several topics that I’d considered covering that didn’t make it. Here are a few candidates for further study:
-
The
{% static %}template tag, for more DRY and fewer hardcoded URLs -
Client-side packaging tools, like
npmandbower -
Customising bootstrap with SASS
Comments